I was commissioned to make two matching end tables for my previous project, Bleached Oak Coffee Table. This was a finish technique that I developed for that project and fortunately kept good records of the process.
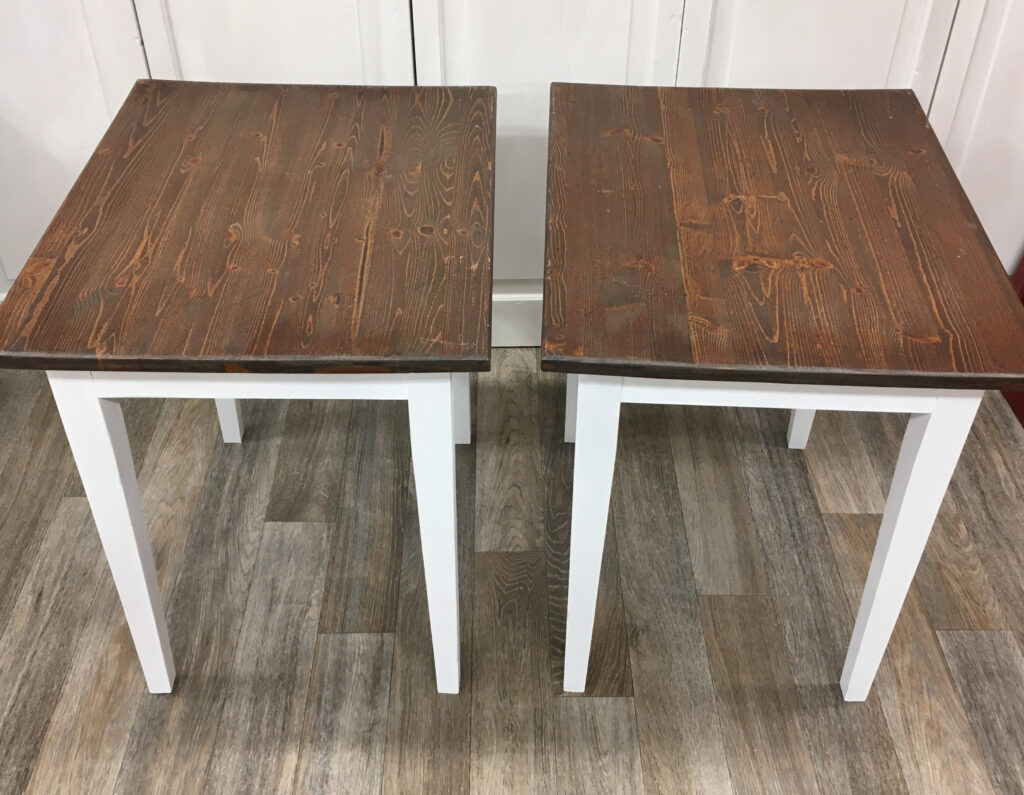
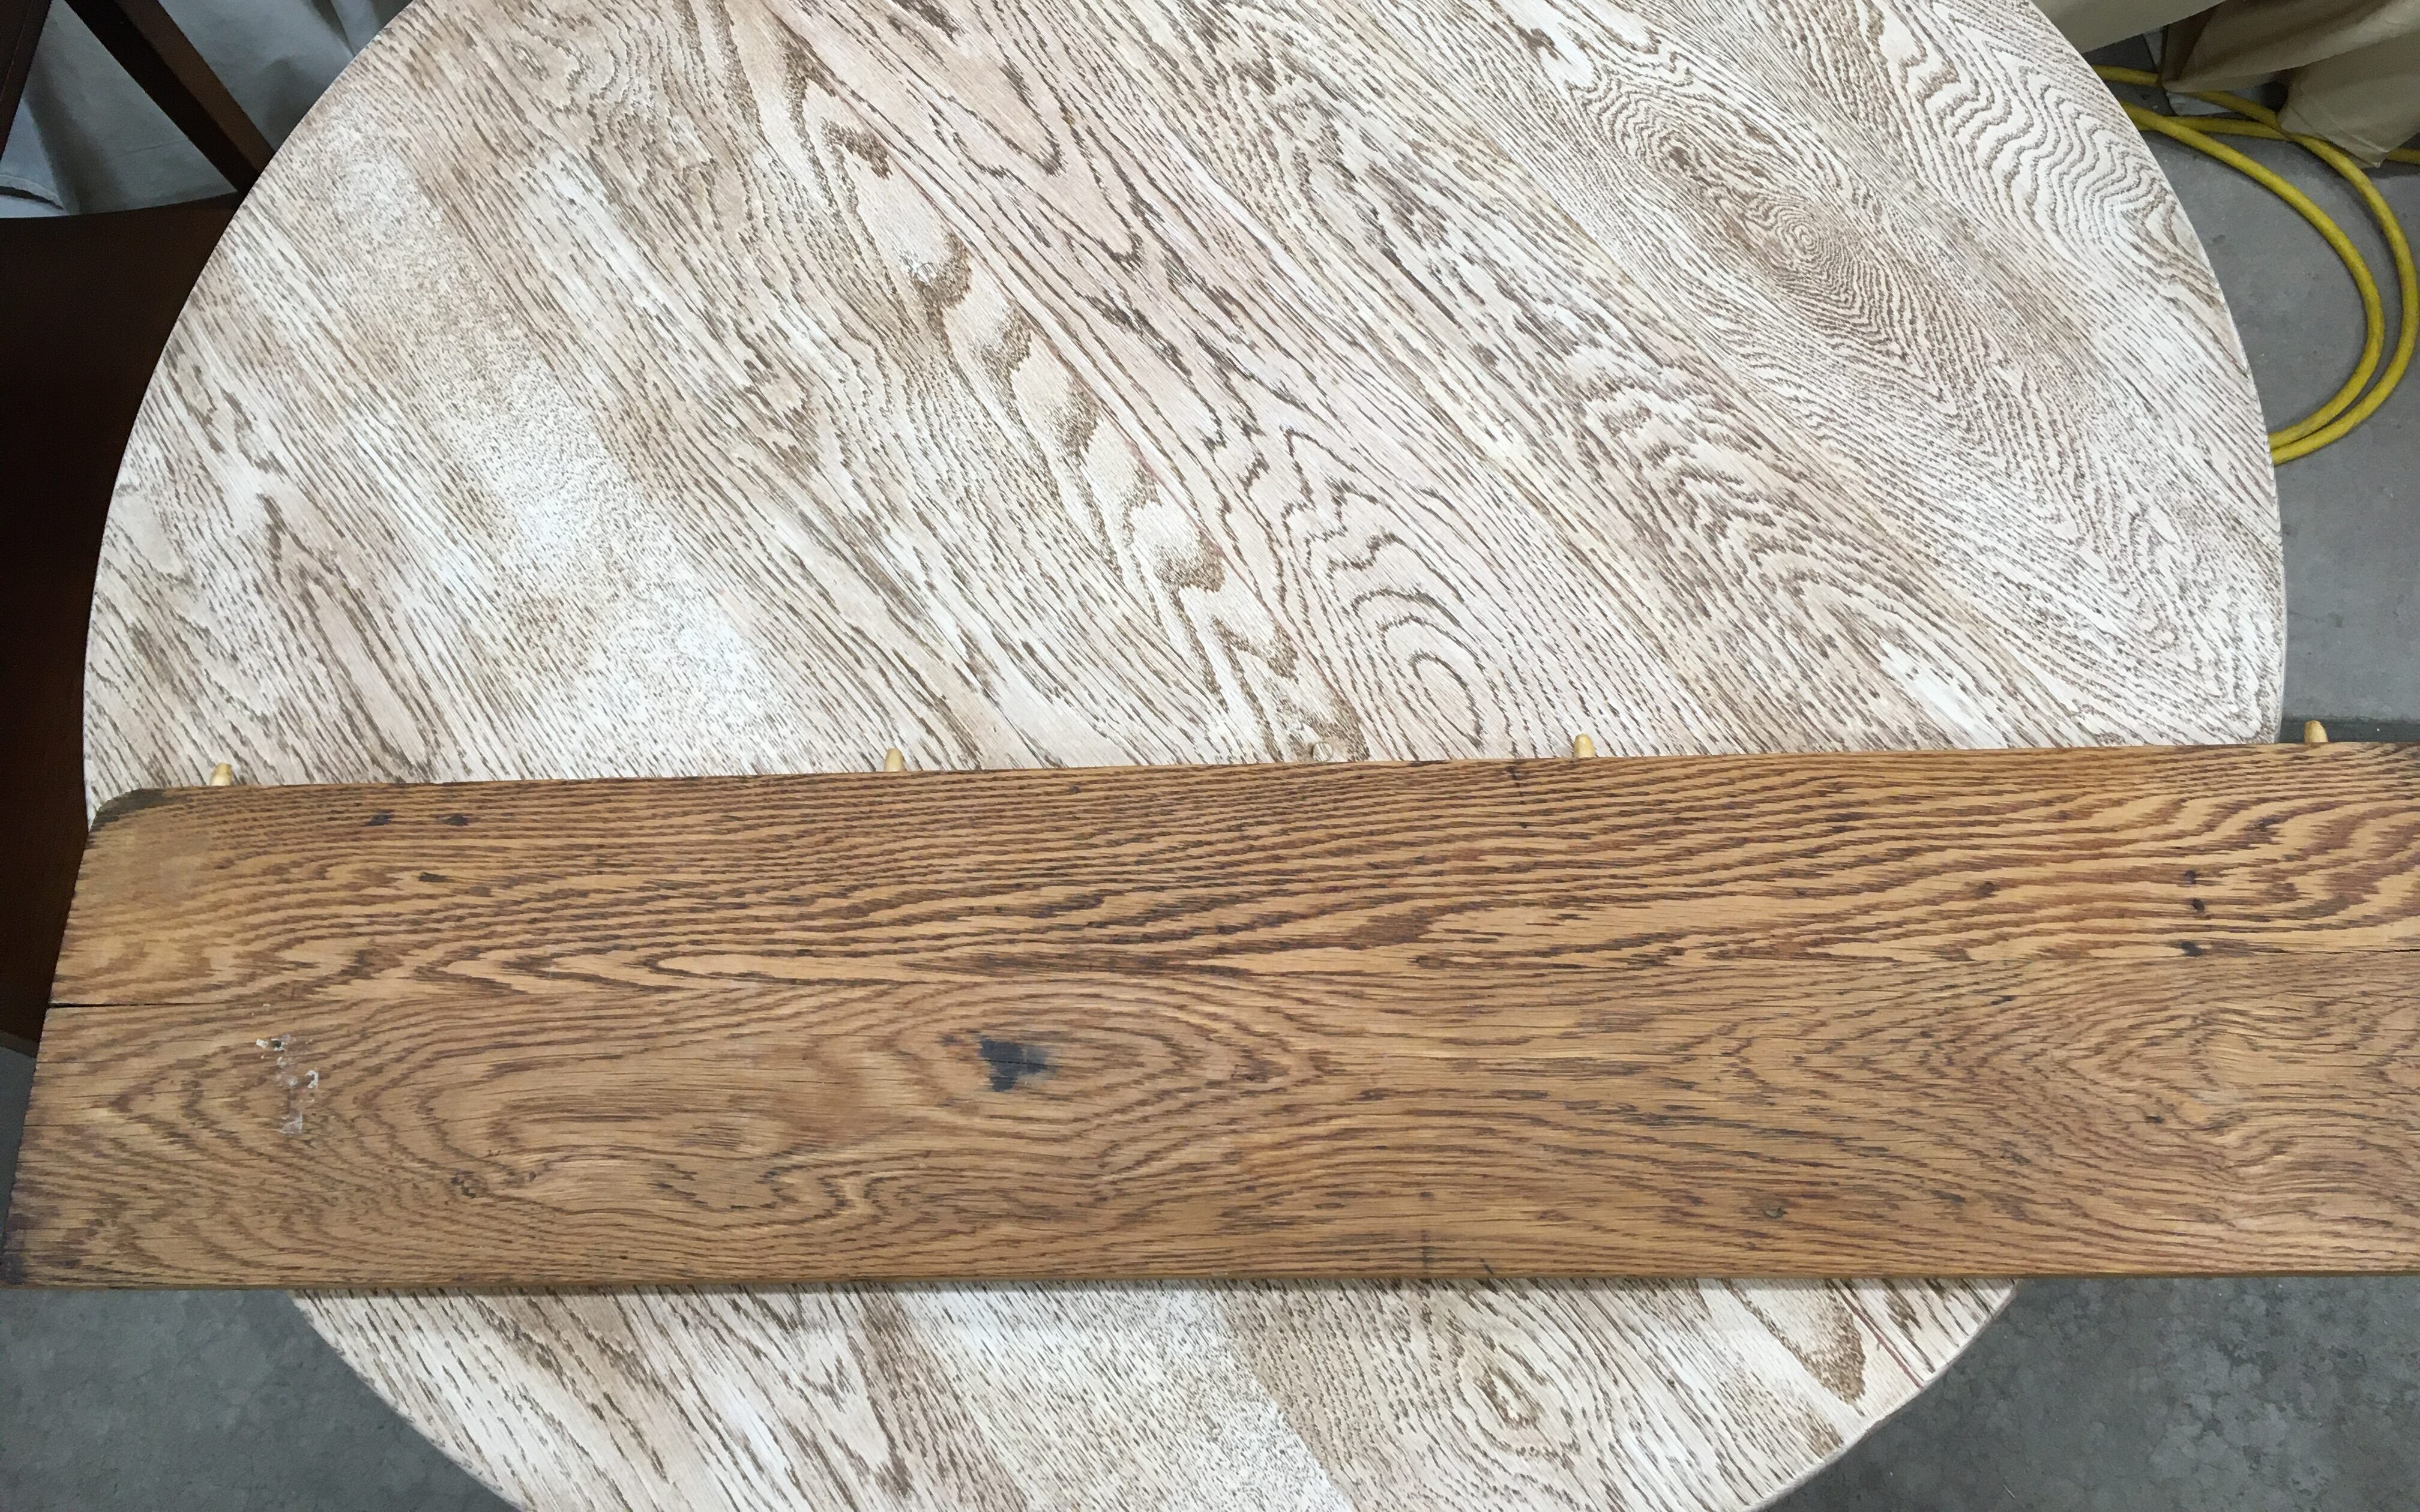
For this project I will be using the two remaining leaves from the original oak table to make two Bleached Oak End Tables with the same finish treatment. The picture above shows how different the bleached table top is from the original table leaf. This finish is a four step process that lightens the natural color of the oak, highlighting the wood grain and finished with a soft ‘unfinished’ look.
After washing both table leaves with TSP to remove any surface oils I lightly sanded the two long edges that needed to be joined together to make the end table tops. I added glue to the edges and to the guide pegs that were original to each table leaf. After clamping and letting dry overnight, I sanded the top side so that the glue joint was smooth and all the old finish was removed.
Supplies Used
- TSP
- Titebond III wood glue
- Bar Clamps for joining boards
- Router for trimming edge
- Sand paper assorted grit
- General Finishes Antique Walnut Gel stain
- Orbital Sander
- Cream Developer 30 Volume
- Quick White Powder
- White Vinegar
- General Finishes Flat out Flat
Because this wood is from a well used table top it is very important to wash it a second time with TSP to remove any remaining oil that could cause the new finish to fail. After drying over night I used my table saw to cut the joined board in half to make two table tops. Using a router I trimmed the wood edges to match the edge of the original coffee table. The new tops are clean and sanded but there is no contrast to show the grain of the oak and the color difference between boards is very noticeable.

We are now ready to begin this finishing technique.
Step 1 – Stain the new tops with GF Antique Walnut gel stain and allow to dry overnight.

Step Two – Using an orbital sander I removed enough stain from the surface to only leave stain in the grain of the wood. Unfortunately, I do not have a picture but it is important that you do not sand so deeply that you remove the dark stain that remains in the grain of the wood.
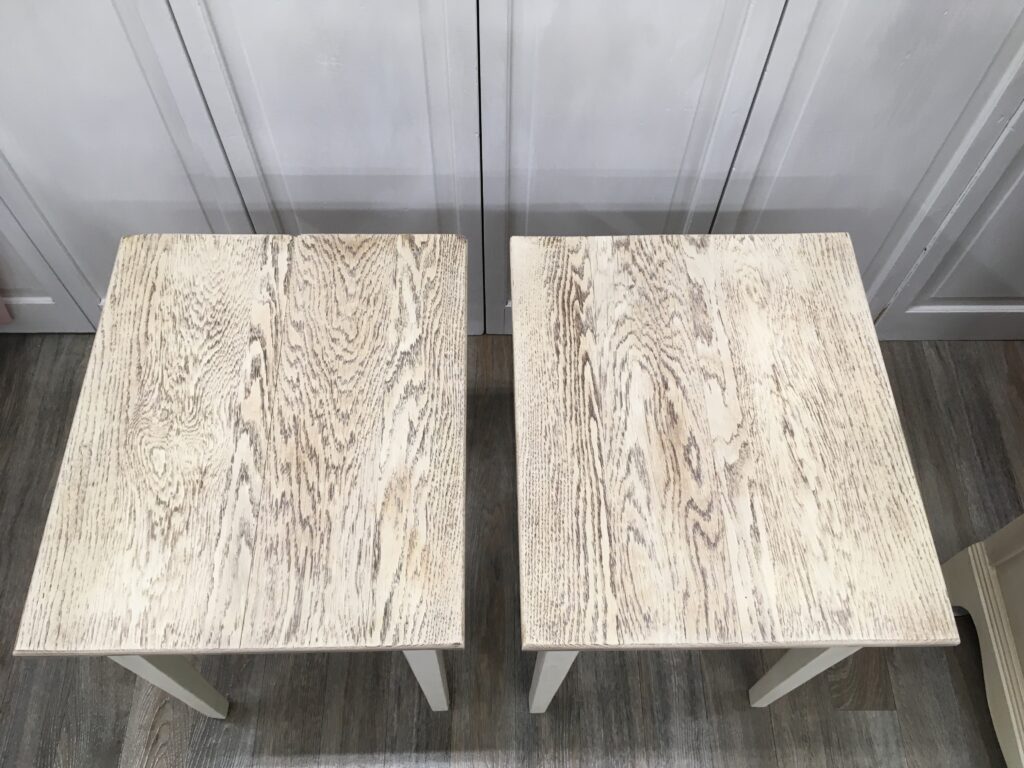
Step Three – The step is to bleach the natural color out of the wood. This will leave a very light to white wood color with the Antique Walnut stain highlighting the grain of the oak. Bleaching may need to be repeated until the wood is the color you want. For this project I bleached the wood 3 times before the ‘orange’ oak color was uniformly removed.

There are several products that can be used to bleach wood. It is important to know that some products will remove stain but not affect the actual color of the wood itself. I chose to us a liquid bleaching product with a powder additive that will bleach the wood fibers. The big plus for this product is that it’s available at most beauty supply stores. I used a mixture of 2 parts cream developer to 1 part Quick White powder. Make sure to have adequate ventilation as this is very smelly and you do not want to breath the fumes. Mix and apply the paste immediately to the wood using a chip brush. Allow it to completely dry on the wood, this may take over night. Then scrape off any residue with a plastic putty knife and wash with 2 parts white vinegar mixed with 1 part water to neutralize the bleach. Allow the wood to completely dry to see the results of bleaching. I bleached this table 3 times to get it as light as I wanted. When you like the results, lightly sand the surface with 320 grit sandpaper.
To seal and protect the wood I applied a total of 4 coats of GF Flat out Flat. Always allow adequate dry time between coats and I like to lightly sand with 420 grit sandpaper after the first 2 coats. After the last coat I use the finest sandpaper (600 to 800 grit) to smooth out any tiny bits of dust that may have gotten in the finish causing ruff spots.
I hope this project gives you an idea of how you can solve issues of undesirable wood tones and encourages you to try something new.