I was told this table was at least 60 years old and possibly an antique. The condition of the table was heavily worn and stained but I saw in the old oak grain the possibility it could be a beautiful table again.

I completely took the table top and pedestal apart to wash all the pieces with TSP. It’s always a good practice to pay special attention to the table top where oils may have penetrated into the wood grain and can cause your new finish to fail.
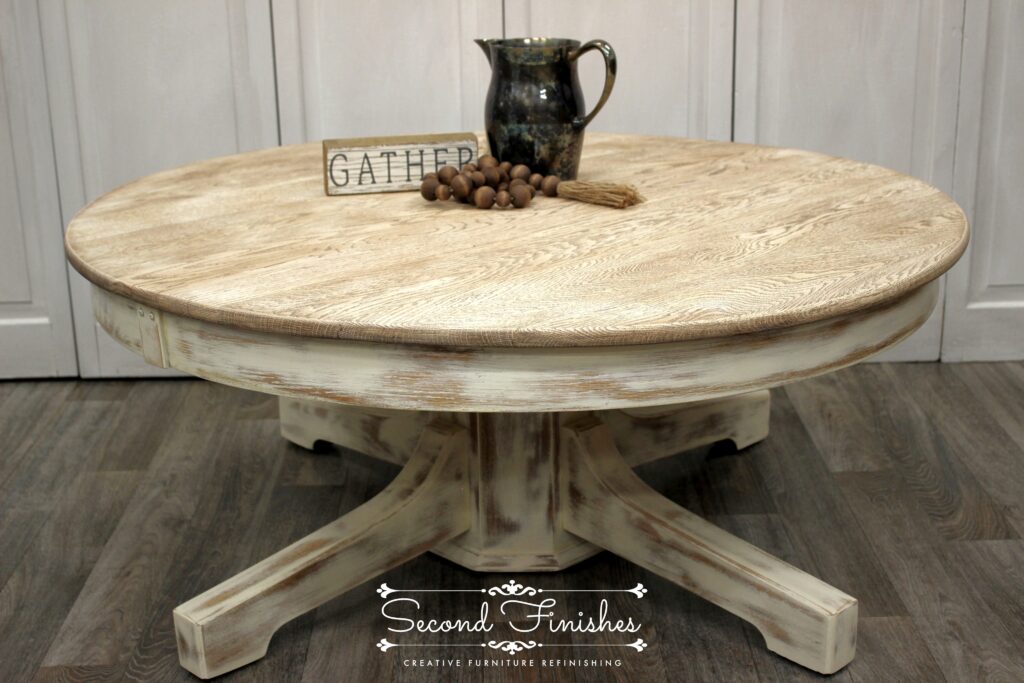
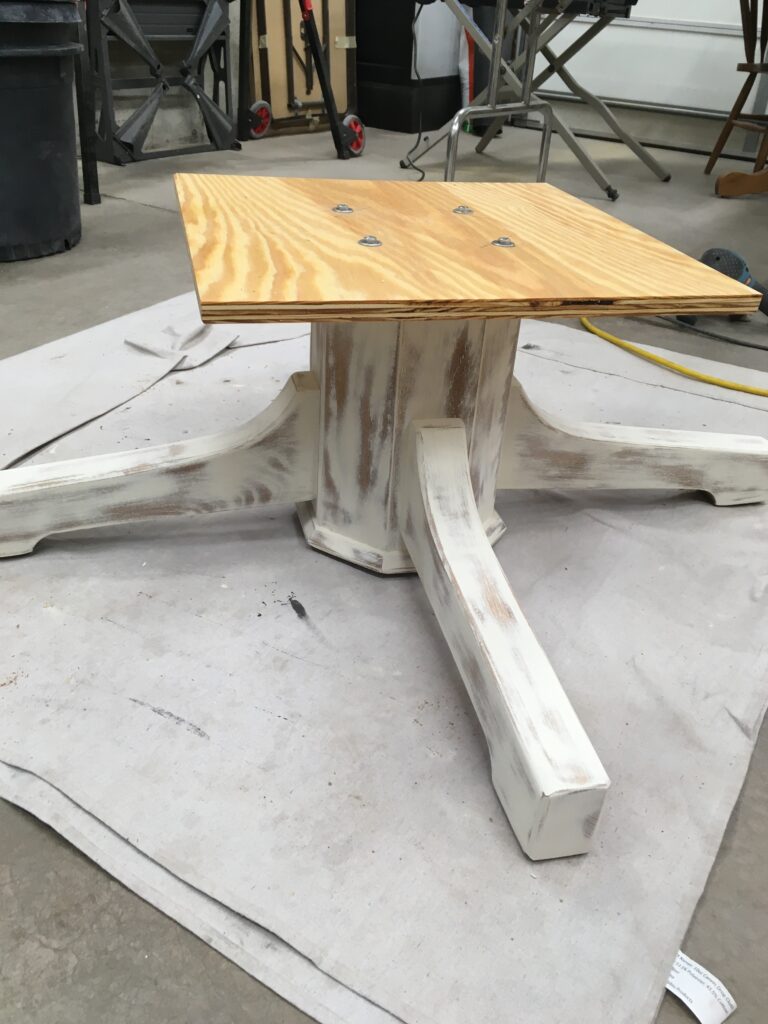
Taking the table apart makes it very easy to sand and make any needed repairs. The issues with this table were; the table height was too short for modern chairs to fit under comfortably and the pedestal base was broken where it attached to the table top. Because of these two issues I decided to shorten the base and make it into a coffee table.

Using my table saw I cut 11″ from the pedestal to shorten the table to a comfortable coffee table height. The table top was wobbling and weak where it attached to the base so I built a new attachment on the base for the table to bolt into.
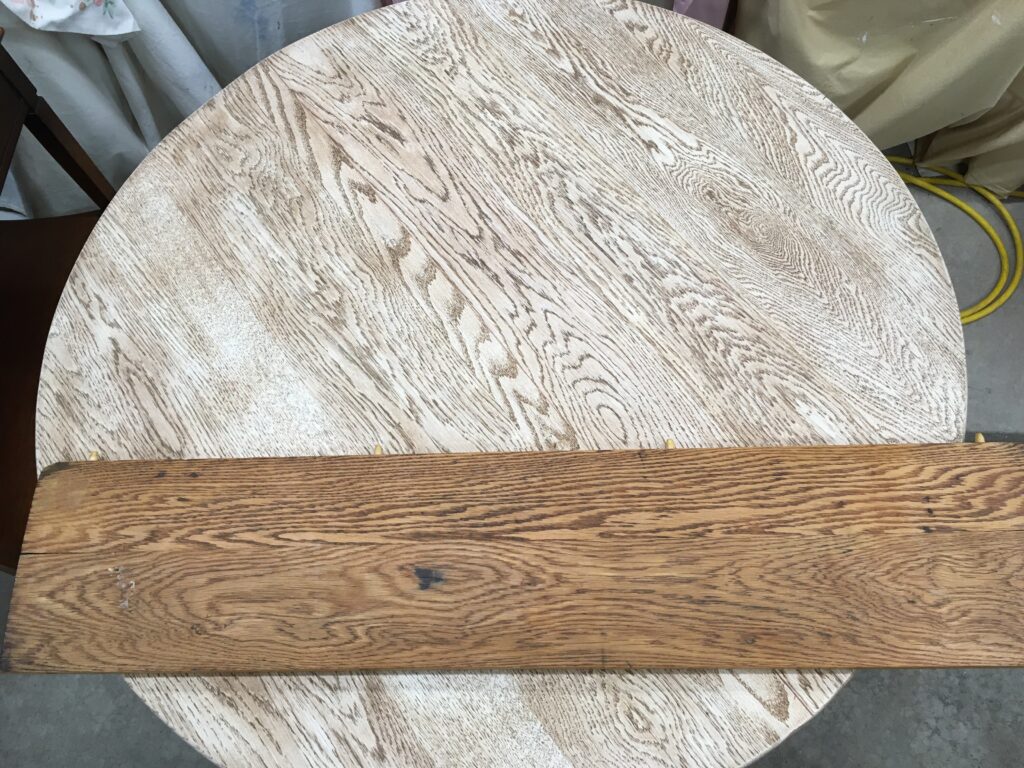
At this point I stained the table top with GF Antique Walnut gel stain. After letting it dry overnight I could see that the stain was developing ‘fish eye’ spots from oil that was coming up from deep in the woods grain. I didn’t have picture of this but when it happens again I will get a picture. I washed it again with a stronger concentration of TSP, let it dry overnight, then sanded the table top leaving stain in the deep wood grain. Unfortunately after drying it stilled showed some oil spots so staining with a dark stain would probably again show ‘fish eyes’ from the oil. I decided to try bleaching the top, not only to remove the oil stains but to lighten the wood.
There are several products that can be used to bleach wood. It is important to know that some products will remove stains but not affect the actual color of the wood itself. I chose to us a liquid bleach product with a powder additive that will bleach the wood fibers. The big plus for this product is it’s available at most beauty supply stores. I mixed equal parts of both products and applied the paste to the wood. I allowed it to completely dry on the wood, over night is good, then using a plastic putty knife I scraped off any dry residue from the wood. Then I washed the wood with 2 parts white vinegar mixed with 1 part water to neutralize the bleach. Allow it to dry overnight to see the true color of the wood. I bleached this table 3 times to get it as light as I wanted.
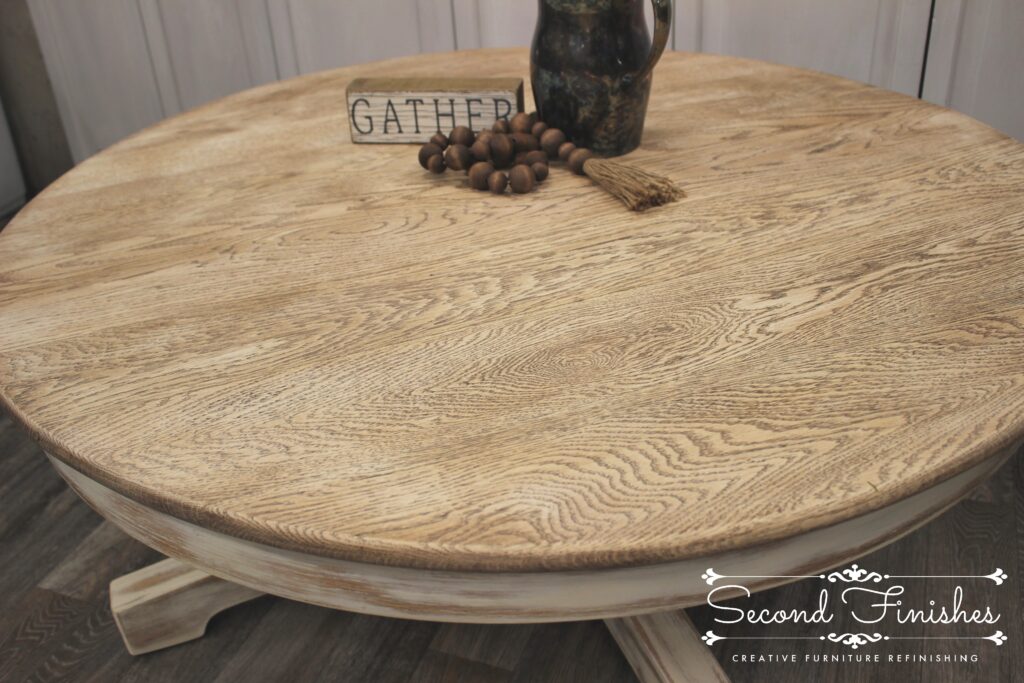
To smooth out any raised wood fibers from the bleaching process I lightly sanded the surface with 320 grit sandpaper. At this point the table is ready for stain and a top coat but I decided the wood was beautiful as it was and didn’t want to change it. So choosing not to use a stain, I applied 3 coats of GF Flat out Flat.

When applying the finish always allow adequate dry time between coats and lightly sand with 420 grit sandpaper after the first 2 coats. After the last coat only use the finest sandpaper (600 to 800 grit) to smooth out any tiny bits of dust that may have gotten in the finish causing ruff spots.